
Tips for sewing buttons and buttonholes

Buttons are a cool feature on many garment sewing patterns, but sewing buttonholes can be intimidating to newer or even seasoned sewists. I will admit to the occasional buttonhole-procrastination* myself. However, I have found that - like anything - with a little practice — adding buttons and buttonholes to a garment can be easy and — dare I say it?? — even FUN! OK, perhaps not FUN-fun but…it is truly very satisfying to see a full set of buttons and buttonholes you’ve just finished!
*Wherein one sets aside a WIP garment for an indefinite period of time, owing to the next step being…the buttonholes.
Beatrix and Citrine (for grownups) and Geranium (for children, shown below) are patterns in my shop that include buttons. My sewing patterns are generally pretty simple and I try to design with the beginner or confident beginner sewist in mind, so of the three skill-level designations I have for my patterns — beginner {easiest}, intermediate {medium}, and advanced {hardest} — those three are designated “intermediate” or “advanced” in part due to the buttons.

I teach sewing demonstrations at my local public library sewing lab about once a month, and Sewing Buttons/Buttonholes is a topic that I teach on a regular rotation. I’ve also just re-released Beatrix, and the new sewing pattern that I’m working on has buttons, so I’ve been thinking about (and sewing) buttons a lot recently.
I find it helps to break down the process into four parts: Mark buttonholes / Sew buttonholes / Mark buttons / Sew buttons.
Here are some tips that I find personally helpful when sewing buttons and buttonholes:
MARKING BUTTONHOLES
It is far easier to move the location of a button than a buttonhole once it’s sewn, so I always start with the buttonholes. I like to place my buttons along the buttonhole side of the placket to visualize where they will go, and then use the buttons to mark the size of each buttonhole.
Tip #1: Use a expanding gauge for even buttonhole spacing
If the button locations aren’t given in a pattern, or if I want to use a different number of buttons than the pattern calls for, I like to use a expanding sewing gauge to mark my buttonhole locations so that they are evenly spaced along the button placket. After deciding on spacing, I place a button at each spot, and make a sideways “H”-shaped mark for each button so that I know how big to make the buttonhole: a horizontal line at the top and bottom of the button, connected with a vertical line. These marks should be directly over the center front (or back) line on the pattern.

SEWING BUTTONHOLES
A buttonhole is basically made up of four sections of zig zag stitches (usually by machine, but can also be done by hand). The zig zag stitches serve to stabilize the fabric around the hole that the button will go through so that it won’t fray or expand. While you could technically just cut a small hole in the fabric for a button to go through, it’s pretty obvious that it wouldn’t last very long or look very good!!
Most sewing machines, even the most basic ones, have a stitch function for sewing buttonholes. It’s at this point that I’d encourage you to refer to your machine’s instruction manual for the specifics, but if there is an automatic button stitch like on my machine, you just have to press the reverse button between each of the zig zag sections, like this:
WATCH: RAE SEWS A BUTTONHOLE (VIDEO - 50 sec)
Tip #2: Sew ALL of your buttonholes before cutting them open
It’s important not to start cutting open any of the buttonholes you’ve sewn until ALL of them have been sewn, and you’re happy with their overall placement. I’ve been known to use my seam ripper to un-sew the zig zag stitches on a buttonhole and move it up or down, or just re-do it and make it smaller or bigger.
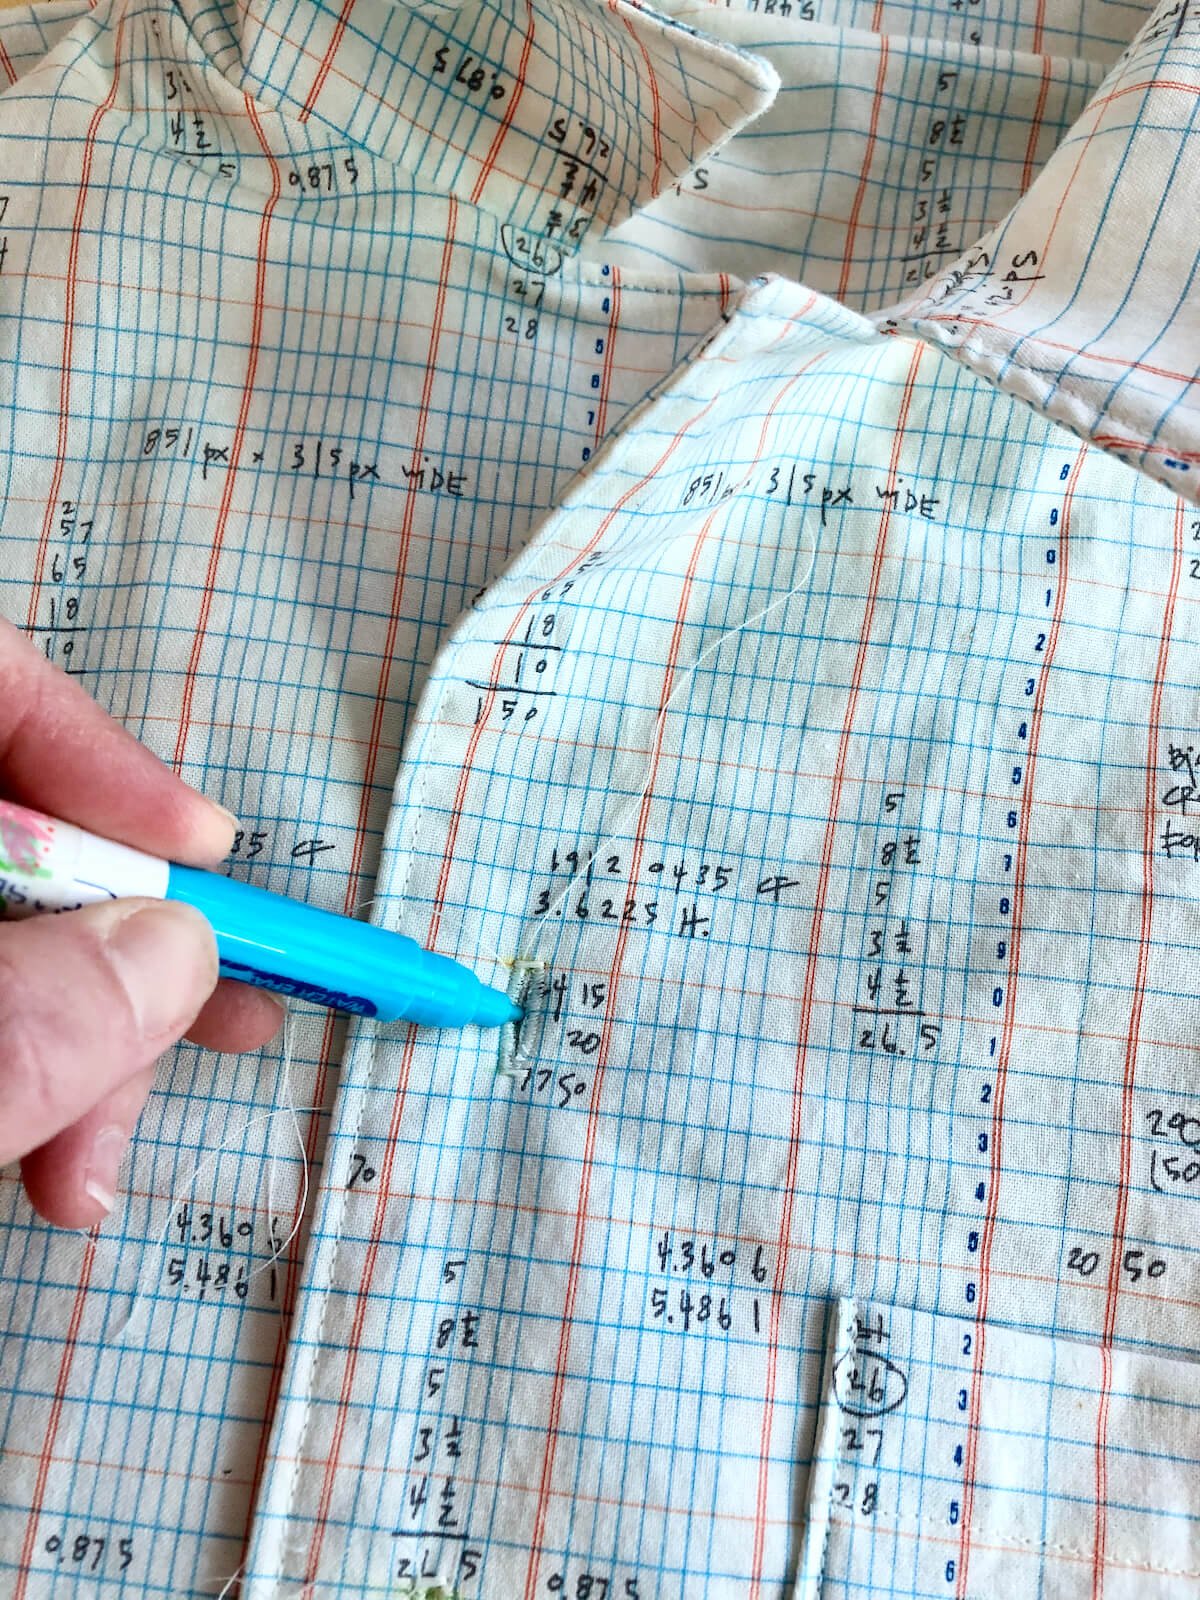
Tip #3: Use a pin + seam ripper combo to open button holes
It’s great if you have a buttonhole tool (I don’t personally have one, or see the need), but you can also use a seam ripper to open your buttonholes! However, it is very easy to accidentally slice through the top of the buttonhole while cutting it open, so to prevent this, I always add a horizontal pin at the top of the buttonhole before opening it, to block the seam ripper from going past the end.
PS. Even if you use a small scissors instead of a seam ripper, this is a helpful tip!!
WATCH: HOW TO OPEN A BUTTONHOLE (VIDEO - 37 sec)

MARKING BUTTONS
Tip #4: Mark button locations using the buttonholes
A rookie mistake is to mark and sew the two sides separately, and then discover that the buttons don’t quite line up with the buttonholes. To avoid this, I use the buttonholes to mark the button locations. Place the buttonhole side of the placket directly over the button side, making sure their center fronts (or backs) are aligned. Then use a disappearing marking pen or chalk to make a dot directly in the center of each buttonhole.

SEWING BUTTONS
Tip #5: Use tape to hold your buttons in place
It’s a matter of personal preference whether you sew your buttons on by machine or by hand, but if you decide to use your machine like I do, my last tip is to use small pieces of tape to hold your buttons in place while you sew them on. Washi tape has a better hold than transparent tape, especially on fabric, and is still really easy to remove or relocate, but I imagine there are other types of adhesive tape that could work for this purpose.

I hope that you’ve found these button tips helpful! Did I miss any?? Feel free to share in comments.
You can find my sewing patterns - including Beatrix, Citrine, and Geranium (which all have buttons) — in my shop!