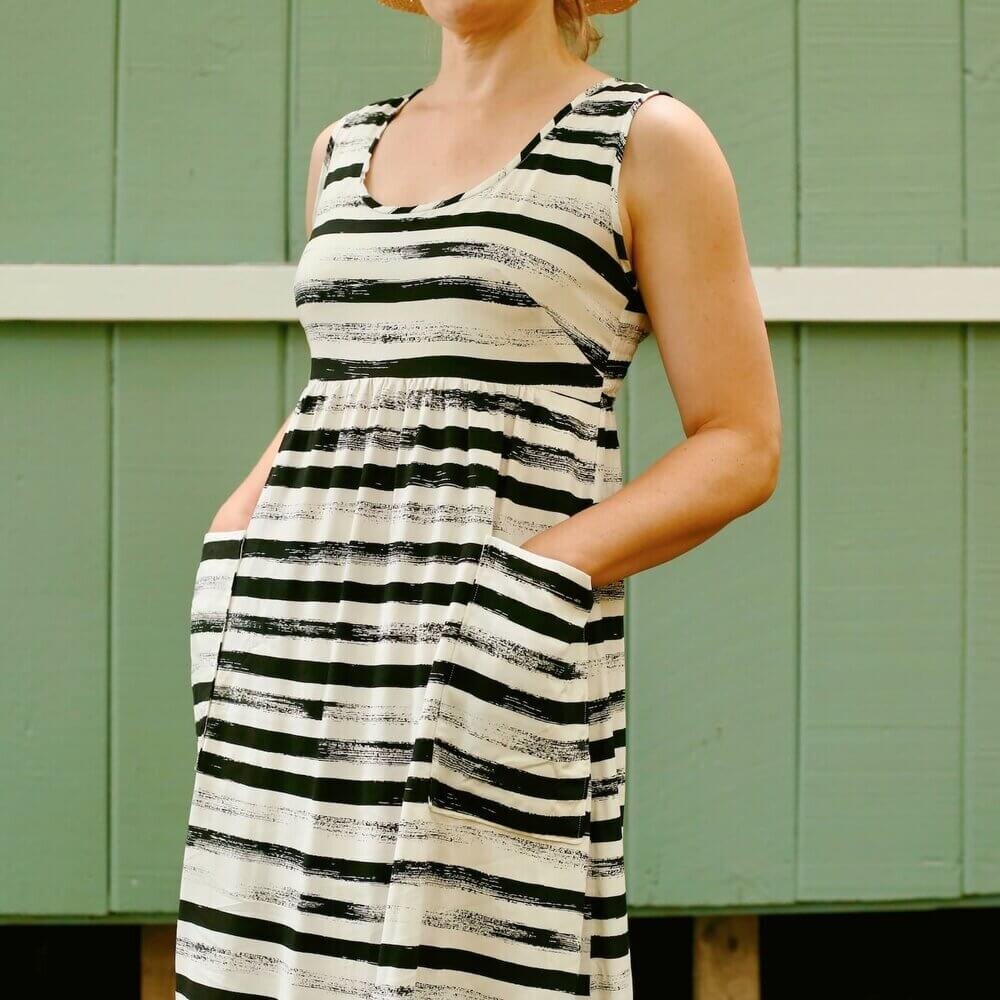
Super Fun Patch Pocket Trick
For this tutorial, I added these pockets to the Trillium (formerly Washi) Sewing Pattern. You can find the pattern in my shop! You can also use this tutorial to add pockets like this to almost any other pattern, such as Ruby, Cleo, Beatrix, Moon Pants or Parsley Pants (find these on my pattern page).
Sewing patch pockets is really easy, and they add a really fun visual detail along with the added utility slash joy that POCKETS bring.
Plus, I have a fun patch pocket trick to share with you in this post that makes them even easier than the classic patch pocket to sew. Most patch pockets are made by cutting a square of fabric and then pressing and folding under the edges before stitching them onto the garment. Personally, I find that to be a bit fiddly and unnecessarily time-consuming.
My method utilizes a folded rectangle to self-face the pocket instead, which eliminates the pressing and folding under of tiny edges, and makes them sturdier in the meantime. If you’ve ever made any of my bag or purse patterns, or used the Geranium patch pocket — which is also found in the free Little Geranium pattern — you’ve used this method, just on a smaller scale.
You can see these pockets in action on my striped rayon Trillium Dress. For this dress, I added these patch pockets rather than using the inseam pockets included in the Trillium pattern.
Here’s a quick how-to:
Materials you will need:
your sewn garment
extra scraps of fabric
1” (25 mm) wide strip of fusible interfacing
You’ll also need a sewing machine, cutting and pinning tools, and an iron.
Step 1. Cut your pocket pieces
Use a ruler (and if necessary, a fabric marking tool) to cut out a rectangle of fabric. Each rectangle you cut will make ONE pocket, so if you want two pockets, cut out two rectangles (that is what I did for my striped pockets, which is shown in this tutorial).
The height of each rectangle should be twice the desired pocket height plus 1/2” [13 cm], and the width should be the desired width of the pockets plus 1/2” [13 cm].
So for pockets that are 9” tall and 7” wide, I cut rectangles that are 18.5” by 7.5”
(This is shown below - note that they are turned sideways in this pic, with the fabric grain running horizontally)
The size of your rectangles can vary based on your preference (and the size of the item you are adding the pockets to), but I like to make big pockets for adult-sized garments, so I’d recommend this size or bigger especially if you’re hoping to store at the very least your phone, headphones, mask, and hand sanitizer in yours. I mean, why not? POCKETS.
Step 2. Attach Interfacing to top of pocket
Fold and press your pockets in half width-wise (like a hamburger, not a hotdog), so that there is a crease in the middle of your pocket. This is where the top of your pocket will be.
Cut a strip of 1” interfacing and place it right along this crease, on the wrong side of the fabric, so that one edge of the interfacing is right up against the crease. Press with an iron to fuse the interfacing in place.
Full disclosure: I often skip the interfacing if I’m using a sturdier fabric, such as quilting cotton.
Step 3. Sew pocket together
Next fold each pocket in half at the crease, with right sides together — lining up the edges and matching the corners — and pin together.
HOT TIP (This is shown in the photo below): Put two pins along the bottom edge, about 2” [5 cm] apart, to mark where I’ll leave a gap in the stitching (and later, turn the pocket).
Then sew around the unfolded edges with a 1/4” [6 mm] seam allowance, skipping over that space at the bottom of the pocket to leave a gap in the stitches :
Step 4. Turn and press the pocket
Trim the seam allowances at the corners of the pocket, being careful not to cut through the stitches.
Using a point turner or other pointy object, turn the pocket right-side out through the hole at the bottom of the pocket, and push the corners out as much as possible.
Press the pocket flat, tucking the seam allowances into the hole at the bottom.
Repeat for the other pocket(s), until you have as many as you want.
Step 5: Attach the pockets to the garment
To attach the pockets to your garment, pin the pockets in the desired location around the two sides and bottom. For my dress, I wanted to line the stripes up as much as possible so I played around with the position a bit before deciding where to pin them. You may also want to try on the garment before stitching them down so that you can be sure they will land where you want them to.
Finally, stitch around the pocket on the sides and bottom, 1/8” [3 mm] away from the edges, closing the hole at the bottom of the pocket as you stitch over it. Be careful not to stitch through multiple layers of your garment by accident!!
Voila! Patch pockets!
Looking for the dress pattern? This is a modified Trillium Dress (details in this post), which you can find in my shop.
You might also want to check out my tutorial page for more tutorials like this one.
PS. If you like this tutorial, you might also like this post: Super Fun Facings Trick!


