How to make a Beatrix View A with the View B button placket
One of my favorite ways to make the Beatrix Top is actually a pattern hack. You may recall that the pattern includes a View A (which I like to call the “shirttail version”) and a View B (which we call the “banded version”).
It’s super duper easy to create this hybrid of the two views, and the Original Beatrix and Let’s have a (Beatrix) party tops are both examples of this. In fact we almost included this version in the pattern but decided against it because a) the pattern instructions were already getting pretty long with the two views and we were behind deadline, and b) it’s just so easy to show with a photo tutorial, so we decided to go with the tutorial. Which I then delegated. TO JESS. Heh. So, in this post, Jess will show you how to make Beatrix with the shirttail hem and sleeves from View A, plus a contrasting button placket borrowed from View B, like this:
Hi folks! Jess here. I was making this Beatrix anyway, so I made myself useful and took some photos in the process! Here goes.
First, cut out and prepare your pattern pieces.
Follow the cutting instructions for View A with ONE EXCEPTION: cut your Back Bodice pieces along the vertical "Cut here for banded bodice (View B)" line.
Also cut two Button Plackets out of a contrast fabric (these are the only View B pieces you'll need). Transfer markings as instructed for View A (page 6), and attach interfacing to Front Facing and Back Facings (page 8). Now fold and press Button Plackets, then attach interfacing (page 8).Here's what you should have:
one front bodice (darts marked)
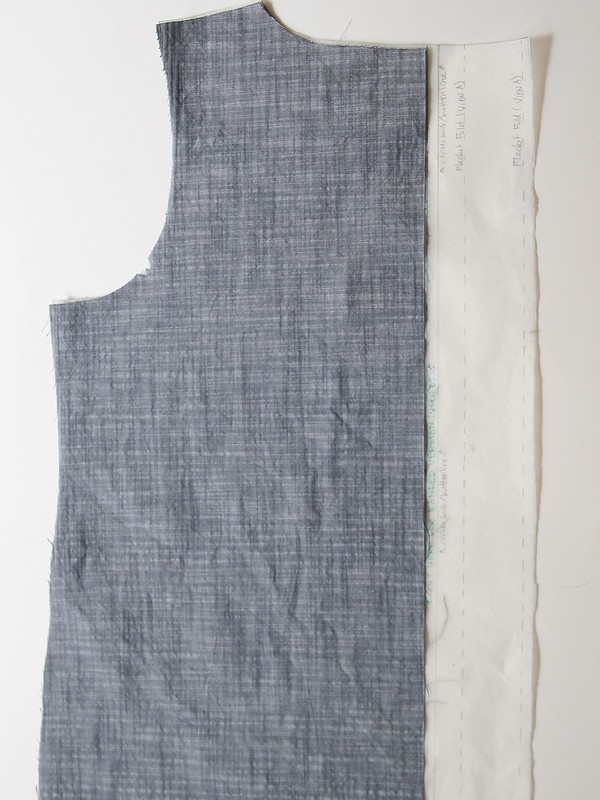
two back bodices cut on the View B line, and two button plackets (folded, pressed, and interfaced)
front and back facings (with interfacing)
two sleeves (short sleeves pictured, marked Left and Right with fold line marked)
Next, sew button plackets to back bodice pieces.
With raw edges at center back and right sides facing, pin each button placket to its corresponding back bodice (if your fabric has a directional print, make sure it's pointing the right way up). Sew button plackets to back bodices with a 1/2" seam allowance.
Press seam allowances away from the bodice, toward the plackets:
Proceed as for View A.
From here, you get to follow all of the directions exactly as written for View A, starting with Step 1. Below are some photos for reference.
In Step 9, fold the button placket to the right side and stitch down 1/4" from the top along the folded portion:
Stitch along the bottom of the folded portion and all the way around the curved hem with a 1/2" seam allowance:
Attach facings using a 1/4" seam allowance:
Step 11: Pin "in the ditch" from the right side, catching the folded edge of the placket on the inside of the garment. I use fabric clips to hold my curved hem in place (and I forgot to take a picture before I sewed the hem, whoops!)
Note the directions of the pins: you'll be sewing DOWN the left side of the back and UP the right side, so pin accordingly.
Here's that finished seam at the top and bottom:
Now all you have to do is add buttonholes, sew on buttons (see page 20 of the PDF for Very Detailed Instructions), and put your top on!I LOVE my new Beatrix! I made this top out of Chambray Union in Indigo, with a Palos Verdes Voile button band.
And those are vintage carved flower buttons made out of shell, so they're shiny and a little hard to photograph (here's a close-up) ... but oh so pretty!


