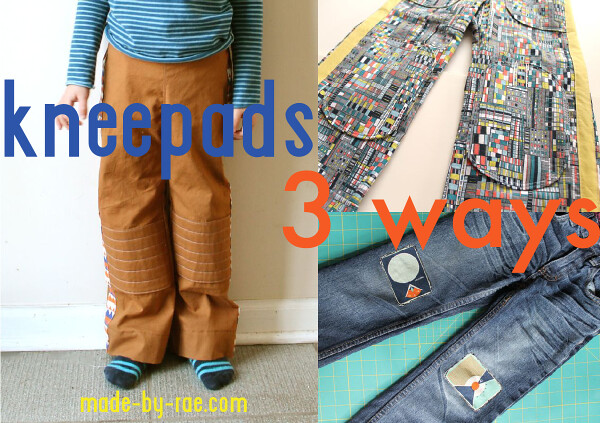
Kneepads - 3 Ways!
We're wrapping up Celebrate the BOY this week, but I have just one more how-to post I wanted to share. Today I thought I'd talk a bit about adding kneepads to pants. You can add kneepads while you're making pants OR after they have been worn through at the knees. All three of these kneepads have been tested by Elliot, and each one has proven to hold up over time. Kids can be rough on their clothes, and kneepads are a great way to ensure that your hard-earned sewing efforts don't go to waste!
The first kneepad goes across the pant leg and is made of a basic rectangle.
In this tutorial I'm showing you how to add the kneepad to a four-piece pant (see this post for the difference between a four-piece and two-piece pant), but you can also use it for a two-piece pant pattern, as long as you finish one of the sides before attaching it to the pant leg. I'll discuss that below.
(1) Cut two rectangles of fabric, at least one inch wider than the width of the pant leg. The height should be twice the height that you want your kneepad PLUS 1" for seam allowance (so if you want a 5" kneepad, cut them (5x2)+1=11" tall). Add fusible interfacing if your fabric is not a bottom-weight like twill, canvas, or corduroy. In the picture, the rectangles are folded in half.
(2) Fold each rectangle in half like a hot dog with right sides together so that the bottom and top edges are even. Pin and sew the two edges together with a 1/2" seam.
(3) Turn the kneepad right-side out and press it flat. Use another pair of pants to help you find where your child's knee will hit on the pant, making sure to fold over the waistband allowance on the pants-in-progress for more accurate placement.
(4) Mark your stitch lines across the kneepad using chalk and a ruler, roughly 1" apart. Pin each kneepad in place to each front pant piece.
(5) Stitch along the lines to secure the kneepad to the pant leg.
(6) Trim the edges of the kneepads even with the edges of the pant pieces.
(7) Finish sewing the pant together. The outside edges of the kneepads will get sewn into the outseams (shown) and the inseams (not shown) of the pant.If you are using a two-piece pant pattern, you have two options: you can either sew one of the side edges together in step 2 before turning it right-side out so it's finished (the other side edge gets finished when sewing the inseam), or you can tuck the outside edge of the kneepad under a tuxedo stripe as shown here:
(See this post for a tuxedo stripe tutorial.)
You can see this kneepad in action on Elliot's Tuxedo Stripe Pants!
Here's another shot of him last fall wearing the linen pants made in the tutorial. They're really soft because they're made out of Essex Linen, a soft but sturdy fabric that's become really popular lately, so this pair has been one of his favorites. Can you believe how long his hair was in this picture?
Here's a how-to for a more "classic"-shape kneepad:
(1) Cut two front and two back pieces (I like to use a contrast color that will peek out a little behind the kneepad).
(2) If your fabric is not very heavy, you may want to add fusible interfacing to strengthen it.
(3) Pin each kneepad front to each back, right sides facing, and sew all the way around, leaving an opening for turning. Then turn it right-side out through the opening, and press it flat.
(4) Pin and sew to pant leg (preferably before you sew the pant inseam, ahem. It can be a bit difficult to sew it onto the pant leg after it's already been sewn together).
You can see this kneepad in action on Elliot's City Pant! If you like this look, you should also check out Dana's Kid Pants with Kneepads for another great way to make kneepads (from t-shirt scraps).
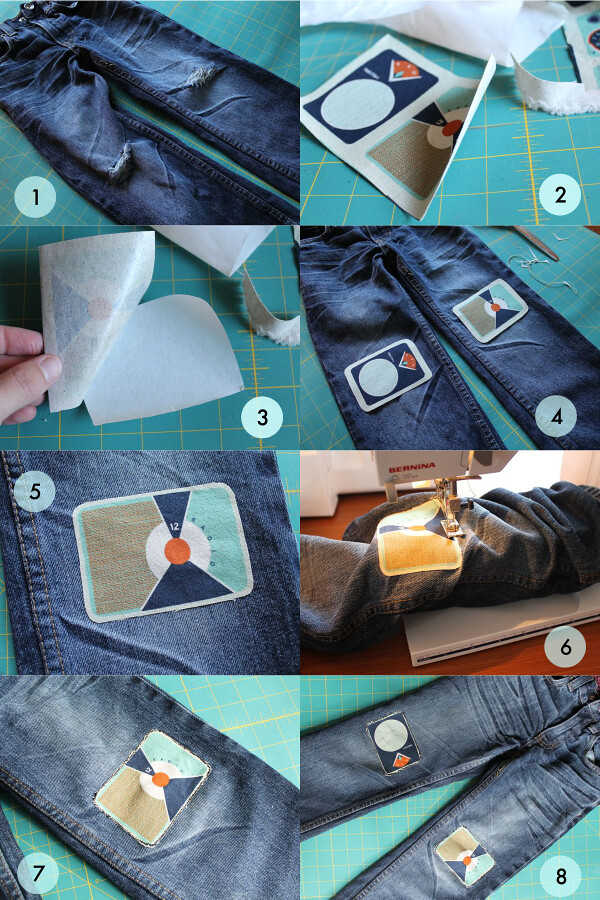
The third type of kneepad is a patch kneepad. I've used Elliot's favorite Melody Miller radio print on two different pairs of jeans to patch holes at the knees. The print comes on a Kokka linen canvas, which is nice and heavy, but you could use a scrap from another pair of pants or any canvas fabric, as long as it's fairly heavy-duty.
(1) The pair of jeans I started with had holes worn through the knees.
(2) Use an iron to fuse a scrap of canvas to double-sided fusible web (like HeatnBond), and cut to size.
(3) Peel the backing off.
(4) Place kneepads in desired location.
(5) Press with an iron to fuse them to the jeans.
(6) If your machine arm will fit inside the leg of the pant with room to maneuver, you can zig-zag stitch around the edges of the kneepad to hold it in place. It might be easier, though, to whipstitch over the edges by hand, using a heavier thread like Coats & Clark buttonhole thread or topstitch thread.
(7) My stitches didn't end up looking too hot...you might want to try a thread that matches better (that didn't stop Mr E from wearing them until the jeans got too small, though)!
(8) Repeat for the other leg.
So, there you go: three different ways to make kneepads...three different ways to make pants last longer!
Celebrate the BOY 2013
This post is part of Celebrate the BOY, a series of boy sewing posts hosted by me and Dana of MADE. Check out my Celebrate the BOY archives for more boy sewing posts. Here's what we've done so far:
DAY 1: Rae: Saffron Pants and Color Roundup / Dana: 5 Steps to the Basic Tee
DAY 2: Rae: Little Bit of Color Hoodie / Dana: Pants Roundup
DAY 3: Rae: Hoodie Tutorial / Dana: Kids Shorts/Pants with Back Pocket Tutorial
DAY 4: Rae: Show your Stripes Turtleneck / Dana: 13 DIY Fabrics
DAY 5: Rae: Stripes Roundup and Celebration Garland / Dana: Favorite Tee Shirt Buddy Toys
DAY 6: Rae: Fox Tee / Dana: Big Stick Jammies
DAY 7: Rae: Bold Prints Roundup / Dana: Beach Robe to House Robe Remix
DAY 8: Rae: City Pants and Tuxedo Stripe Pant / Dana: we be jammin PJ roundup
DAY 9: Rae: Mustache Roundup and Piping How-to / Dana: Stripes, Checks, and Piping, oh my
Day 10: Rae: Piping Roundup / Dana: some like it Chewie, some like it Hoth
Day 11: Rae: Kneepads - 3 ways / Dana: Muscle Tees


