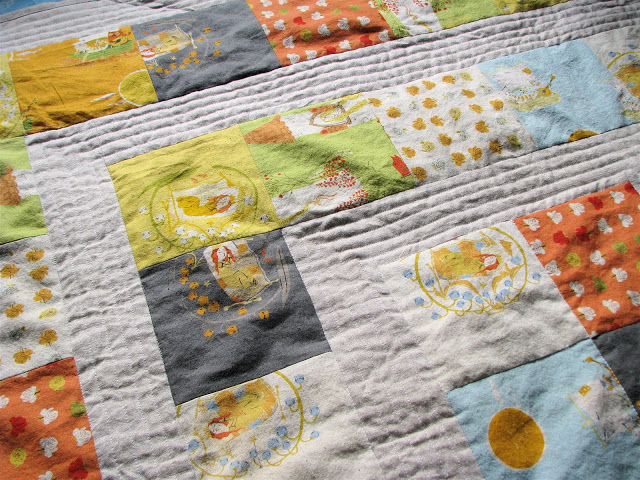
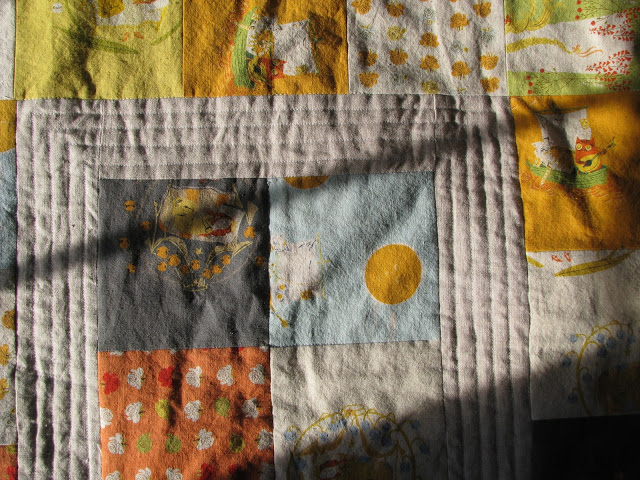
FINITO! Storytime Squares Quilt in Far Far Away II
It's finished (first shown in this post)!!! I'm so geeked about how this turned out! I'm calling it my "Storytime Squares Quilt." I may change my mind about this later but right now I am selfishly hoarding this one for myself. Me, me, me. Elliot saw it right before he went to bed yesterday and said, "Is that for ME?" and when I said, "NO it's for your MAMA!" he said (and picture the cutest pouty face and puppy dog eyes here) "But I really, REALLY like it." So I caved and said he could sleep with it for one night. Turned out he was just messing with me and wanted the other three quilts that are already on his bed instead. Little stinker!
FREE DOWNLOAD!
So just in case you wanted to make one of these yourself, I've made up a quilt sheet that shows you how to make the quilt top as a downloadable PDF. You can download your own free copy right here by clicking on this image:
Please note: You may not email, photocopy, sell, or distribute this PDF in any other way. Please link to this blog post (but not directly to the PDF) if you would like to share this with others. Thanks
!Finished Dimensions: 46" square
Materials needed:
eight fat quarters of printed fabric (I used Far Far Away II by Heather Ross) or 48 - 5.5" squares
2 yards of 54" wide solid fabric for sashing and backing
cotton or bamboo batting
If you're using the printout and want to use FFAII, you'll have to match up the fabrics I used in the picture above since I forgot to label them on the printout. Campy! ACK, just realized it's also upside-down! Extra Campy!!!
Other notes on making this quilt:
I actually used 100% linen for the sashing and backing which ended up being a bee-atch to quilt with. It's seriously woobly and slidey-all-over-the-placey. So if you decide you are insane enough to use it too, may I suggest using a spray starch on it (Magic Sizing was recommended by a reader in a previous post and is a buck for a can at Target) both before you cut your pieces and after you piece the quilt top together.
Cut your backing square out before the rest of your sashing (50" square minimum, but you can cut a 54" square the width of your fabric and still have enough for the rest of the sashing)
I used a single layer of bamboo batting for the center
I used a plain square of linen for the backing
I also highly recommend using a SAFE temporary spray adhesive (I used Sulky) to attach the layers before quilting them together. There was a comical Charlie Chaplin-type moment after I spread the backing on the floor and sprayed on the adhesive when I got both hands stuck and tried to use my feet and then realized my feet were stuck too. It was dicey for a bit, but I'm happy to report I no longer have a giant piece of linen stuck to my body.
I used a walking foot on my sewing machine for the quilting.
To quilt the layers together, I stitched in the ditch around each section of squares and then drew four quilting lines 1/2" apart between each section with fabric marker before quilting it up.
I drew my quilting lines for the outer section just slightly less than 1/2" apart so that there would be space at the edge for the binding to fold over.
I used my Cheater Bind-off Method (there's a tutorial at that link) for binding off the quilt. It worked perfectly since the line of stitching I used for the binding lined up just right with the other quilting lines!
How about it? Do you guys have other quilting tips you'd like to share? Let me know what you think! I'm feeling very much like a Real Quilter here but I'm sure there's much more to learn.


