Rae pretends she can quilt (and shares a quick quilting tutorial)
Disclaimer: I am not a Real Quilter. I have never taken a quilting class before, nor do I have any other kind of training in the quilting department besides that which my mother dispensed in the rare moments I actually listened to her. I certainly did more eye rolling than listening as a general rule, so what sewing knowledge I was able to get through my stubborn head can only be attributed to her, not me, and is laudable indeed.
With that said, I like to make quilts because I have found them to be pretty intuitive on their own. With very little expertise one can produce a very satisfying end product. Add to that the fact that they are quite simply the best way one can use multiple fabric prints or colors in one place. I especially like to make baby quilts because they are small and quick and double as play blankets as well as bedding.
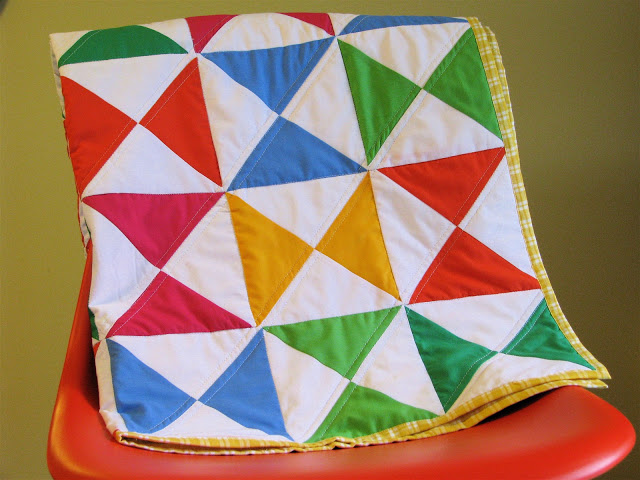
So despite the fact that I am a complete Quilting Imposter, I managed to pull together a tutorial for a baby quilt that is quite nice: Crayon Box Quilt Tutorial (updated: this tutorial was originally posted at Sew Mama Sew and has since been moved back to my blog). This quilt is very similar to the one I made for Clementine last year although hers was 6 by 7 squares and this one is 6 by 6 squares.
If you follow Sew Mama Sew at all, you'll know that many amazing quilters have contributed their expertise in the form of Sew Mama Sew Tutorials. They include but are certainly not limited to: Elizabeth of Oh Fransson!, Alissa of Handmade By Alissa (and founder of Modern Quilt Guild), and Ashley from Film in the Fridge (who I had the pleasure to meet this summer in Vermont!). If you have time you should visit their blogs. They are Real Quilters and I have learned oodles from them and I am sure you will too.
I think the perspective I can offer as a completely untrained quilter is that there are ways to "cheat" (or as Amy Karol would say, "bend the rules") when it comes to quilting. These cheats don't result in award-winning heirloom quilts but for small projects like this one (that will probably get beaten up anyway), I'm quite sure it doesn't matter. Plus it makes me love quilting just a little bit more when I can make a nice-looking quilt quickly without toiling over it for eons.
So to go along with that tutorial, I wanted to share another trick I use to bend the rules here on the blog, which is that I bind my quilts using the backing instead of making separate binding. I'm sure this has all Real Quilters Gone Before rolling over in their graves, but it makes me feel pretty smug/clever. Here's a quick tutorial:
This is a tutorial to show you how to use the fabric on the back of a quilt to bind it off. Most quilts have a separate strip of binding that goes around the outside of the quilt. Here I'll show you how to take the backing and fold it over the edge of the quilt to finish it. This works best for small baby or doll quilts.
Step 1: After quilting the layers of your quilt together, trim the batting along the outside of the quilt right to the edge of the quilt top.
Step 2: Trim backing (the yellow plaid fabric in my photos) to ONE INCH all the way around the quilt.
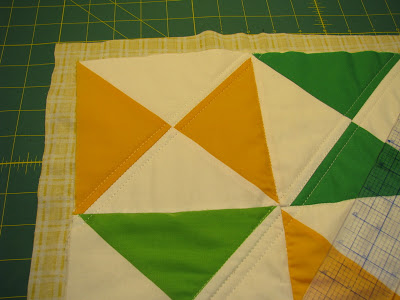
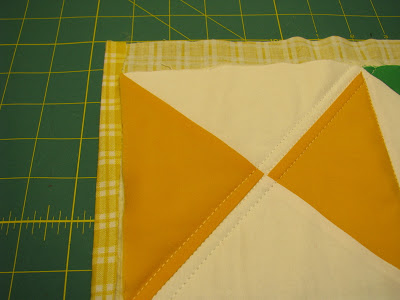
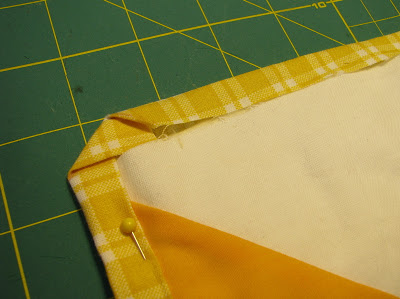
Step 3: Starting near a corner and working clockwise around the quilt, fold the backing in half so that its raw edge is lined up with the edge of the quilt top (it will now be 1/2" wide). In the photo below, I have folded the edge on the left:
Step 4: Fold backing one more time along the edge of the quilt top so that it overlaps the quilt top by 1/2". Pin in place.
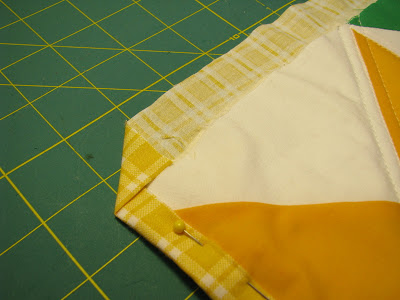
Step 5: Mark a diagonal line at the corner. The base of the line should start where the corner of the quilt top is (under the backing) and end 1" from the corner along the raw edge.
Step 6: Fold backing along line
Step 7: Fold the backing in half again (I drew a line in the first photo with marker so you can see where) to line up raw edge with edge of quilt top.
Step 8: Fold backing over again at the quilt top edge so that it again overlaps the quilt top by 1/2." Repeat this method all the way around the quilt until you have the entire quilt backing folded and pinned.
Step 9: Stitch close to edge of backing around entire quilt to finish.
In the photo above, you can see that your quilting lines will be visible past the stitching for the binding since they go all the way to the edge of the quilt top. As long as my stitching blends in with the quilt backing, I don't sweat this too much, but if you don't like how this looks you can pull out those threads and knot them where you want them to end using a needle.
Ta-daaaah! Finished quilt!


