Tutorial: Make baby tights
This tutorial will show you how to make a pair of tights by tracing another pair. Don't have a pair on hand to trace? I've made a PDF baby tights pattern in size 3-6 months (with 6-12 months size modifications) that will be available soon
(UPDATED: CLICK TO DOWNLOAD THE FREE PATTERN HERE)!
These baby tights can be sewn with either a serger OR a regular sewing machine. Stretchy knit jersey or old t-shirts make the best materials, and you'll also need some 3/4" wide elastic. I'll talk about fabric selection, needles, and sewing techniques, so here we go...
Step 1: Get some fabric
For baby tights you'll need very little fabric. An 18" square of fabric will probably do it if you're making tights for an infant, obviously more if your baby is larger.
The type of fabric needed for these tights is lightweight knit jersey with lycra/spandex. Jersey is different from interlock as it does not look the same on both sides and tends to curl on the edges. Interlock is the same on both sides, doesn't curl or stretch as much, and will not work as well for this project. Some ribbed knits might work, but most ribs tend to stretch mostly in one direction. When you select your knit, make sure it is thin, it is very very stretchy, and that it stretches in both dimensions (called 4-way stretch). This is why the addition of lycra/spandex is helpful. One way to tell if a fabric will work is to take the fabric in your hands and try stretching it widthwise and then lengthwise. It should feel pretty stretchy both ways, even if one is a little less than the other. If it is significantly less stretchy in one direction, it's probably not a good choice for these tights.So where can you find such a fabric? One of the easiest places to get it is from stretch t-shirts.
Most t-shirts from the major brands (JCrew, Gap, BR, Old Navy) are made with lots of stretch so recycling your old t-shirts is a great option. I'm not talking about the traditional screen-printed "beefy-Ts" which are too thick and won't have enough stretch. Here's the tag from the grey t-shirt I used for the grey tights I posted yesterday so you can see the ingredients (a cotton/lycra blend):
And just in case you're wondering, here's what I used from left to right in the top photo:
aqua: bamboo/spandex blend jersey from Joann (worked great! very stretchy!)
red stripes: cotton jersey knit from Pacific Fabrics (wasn't quite as stretchy as I wanted, but pretty good!)
grey: old Banana Republic stretch t-shirt (worked great! very stretchy!)
green stripes: cotton jersey knit from Pacific Fabrics (pretty good!)
sky blue: thick cotton knit t-shirt (this really did not work well...too thick, not very stretchy)
If you don't have t-shirts you can recycle, look for knit jersey with cotton/lycra or bamboo/lycra blends.
Step 2: Check/change your sewing machine needle
You need to use a needle that will work with knits. I use Schmetz Stretch needles which work with all of my machines (Bernina, Singer, Brother). Sew a small sample of the knit before you begin. If there is any thread catching or wonkiness going on inside your machine, DESIST and CHANGE YOUR NEEDLE. It's not going to get better the longer you try. You're just going to get more frustrated and emit swears/big fat baby tears. You might need a stretch needle for a different weight fabric too (like size 11 instead of 14). If ballpoint or stretch needles aren't working, try using a basic Universal needle. You might be surprised at what works. I do not use a walking foot for sewing knits because I am cheap and the walking foot for my Bernina is expensive ($150), but I understand that can also help. By the way, I do not change the needles on my serger, just my sewing machine.
Step 3: Make your pattern
(if you downloaded the free pattern, skip this step)
Trace around the outside of the tights 1/4" from the edge (for seam allowance), ending at the center seam. Make the outside edge as straight as possible even if the tights "turn". Yes, my real name is Rachel. Isn't it fun what secrets you learn when you read the whole tutorial?
and then connect the center seam line:
And add 1" to the top of your pattern for the waistband (shown in next photo for Step 4).If you'd like to make a pair of tights the next size up from the ones you have, add 1-2" to the bottom of the foot and 1" to the top to size it up.
DON'T HAVE A PAIR OF TIGHTS TO TRACE? CLICK HERE to download my free tights pattern for 3-6 months. It's got modifications for 6-12 months, but that's as much as I can help you with.
Step 4: Cut out your fabric
Place the long edge of the pattern on the fold of the fabric and cut out your fabric. You'll get the best results if the stretchiest dimension of the fabric goes top to bottom on your tights.
Hint: The first pair of red-striped tights I made ended up being a little too small because the striped jersey didn't stretch as much as I expected. If you don't have a super-stretchy jersey, add an inch or two to the top and bottom of the pattern. You can always make them smaller, but not larger. And remember to line up stripes if you're using striped fabric!
Your pieces should look like this:
Step 5: Sew the center seams together
I did this on a serger, but you can also use the overlock stitch on your regular machine (I'll show you that in just a minute). Place right sides together and sew only the center seam using a 1/4" seam. DO NOT KEEP SEWING DOWN THE LEG!
Step 6: Sew Inner Leg Seam
Open tights up and line up center seams. Starting at one toe edge, sew the inner leg seam together, again with 1/4" seam. On a serger it is helpful to pull the legs apart like they're doing the splits as you cross the center seams.
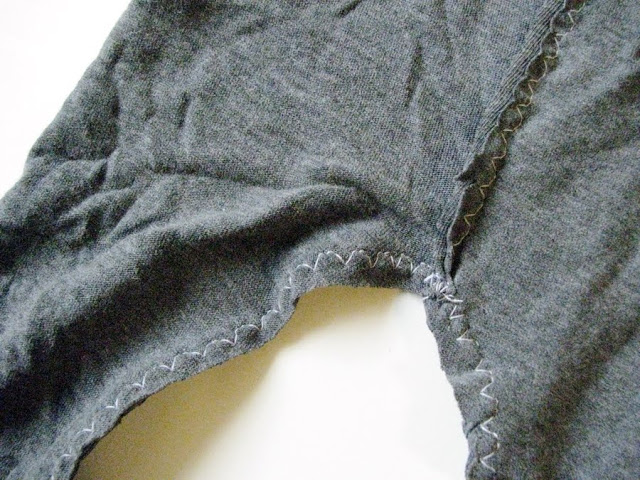
Here's what it looks like if you use the overlock stitch on a regular machine (the stitch that looks like a combination between straight and zigzag stitch). I backstitched a few times at the crotch (sorry!) to strengthen the seam there. That's where they're most likely to split apart.
Not as pretty as a serger, but it's going to be on the inside so don't sweat it. I'd recommend using matching thread though; when Clementine wears these they look slightly bumpy along the seams and the white thread shows a little. Oh well, they still look great.
Step 7: Turn tights right-side out and try them on your baby. Make adjustments as needed.
As I mentioned in Step 4, after I tried the pair on the left on Clementine I realized this fabric wasn't going to stretch as much as real tights, so I added two inches to both the bottom and the top, and tried it again (right). If you use jersey blends with spandex or lycra, you shouldn't need to do this.
Step 8: Cut and sew elastic waistband
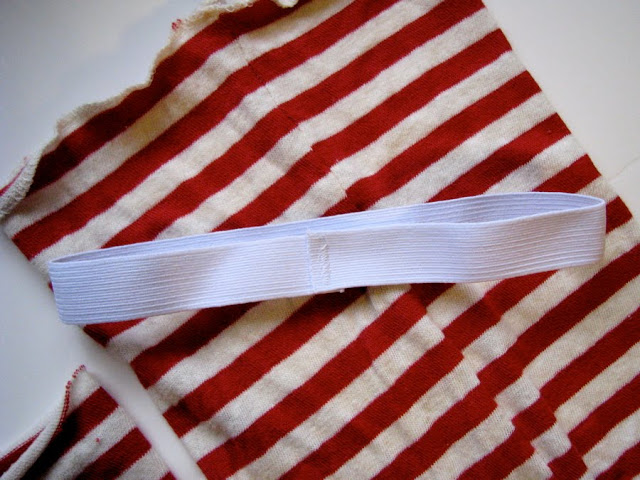
Take a 3/4" strip of elastic and cut it a half inch larger than your baby's waist. Clementine is 7 months old and her waist is about 16" so I cut a piece 16.5" long. I used knitted elastic because it's more stretchy than woven but I'm not sure it's really that important. Overlap the ends by 1/2" and use a zigzag stitch to secure ends together. This makes the elastic slightly smaller than their waist, but I find it stretches out when you sew it in the next step.
Step 9: Pin elastic to tights
Find the center of the elastic and pin it to the inside of the front center seam, folding 1/4" of the fabric over the elastic. Pin the overlapped part of the elastic to the center back. The tights are still right-side out, by the way.
Step 10: Stitch elastic to tights
This part is a little tricky, but it's not going to show. With the 1/4" of fabric directly under the needle as shown, place the back center seam under the presser foot. Pull that pin out so it won't get in the way of the needle. Sew the jersey-elastic-jersey sandwich together with a zigzag stitch, stretching the whole thing as you go. I use my left hand behind the needle to pull the elastic through and my right hand to fold the knit over the edge of the elastic and stretch it out. It helps to stop and restretch/refold as you go.
It will look like this when you're finished:
Step 10: Zigzag around again.
This will hide your elastic entirely. Fold the elastic under once more and zigzag around the whole thing again, stretching as you go.
Finished! Huzzah. Now go take a picture of that darling baby in her new tights and send it on over!And still more blah-blah...I'm really curious to see if this sort of thing works for bigger tights (non-baby sizes). It would really depend on whether the material selected had the same amount of stretch as real tights. Definitely comment if you experiment with this; I'm sure others would love to know as well!
I'd also like to refer you to Built By Wendy's Sew U Home Stretch if you don't have much experience with knits. I found this book immensely helpful (and it has great patterns in it) and much of this information probably came from her in some way.
Thanks for reading this whole thing. I realized after I started it that even though this is a really simple project, there are so many tricks for working with knits that I've learned over the years that I felt needed to be explained. I hope despite it's length that it will make sewing baby tights simple and easy for you!
You might also like my other posts on sewing with knits - check it out HERE!


