TUTORIAL: Pleated Pocket!
Just a minute ago I submitted my final exam for my very last class for my Master's Degree! YAAAAY!!! (to be exclaimed with flailing arms all Kermit-the-Frog-style). I'm FREE! Well at least academically speaking. So let's start tackling that "list," shall we?
Here is the long-awaited Pleated Pocket Tutorial. Now you too can make your very own and add it to everything: skirts, shirts, purses, baby dresses and more. This really is so simple. Enjoy!
 P L E A T E D
 P O C K E T
T U T O R I A L
made by Rae
please do not take images from this tutorial without permission. thanks!
Materials
For EACH POCKET cut:
- 1 rectangle for the top band of the pocket: 1.5"x12" for narrower band (yellow one, shown in tutorial) or 2"x13" for wider band (pink one pictured above)
- 2 rectangles for the bottom of the pocket: 5.5" x 8" each
Instructions
Step 1: Press under 1/4" along the bottom side of the top band (I did both sides but later realized I should have just done one).

Step 2: Fold top part of pocket in half lengthwise.

Step 3: With a 1/4" seam allowance, sew around just two edges of the top band, the top edge and the side across from the fold (has been marked with purple in picture below). This will leave the bottom edge (the one you pressed) open.
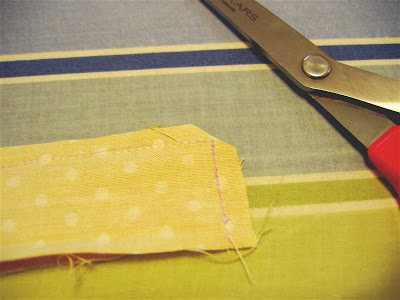
Step 5: Turn right-side out, poking the corners out with a tweezers or a pencil or some special thingamabob you purchased for this very purpose. Press. If you are smart you will also fold and press the raw bottom edges under along the folds you made in Step 1. Did I do this? NO. Dur!
Now set this piece aside.

Step 6: With right sides together and a 1/4" seam, sew the bottom pocket pieces together, leaving the top open. When you do the corners, instead of making them square, sew them as rounded as you can. FOR BEST RESULTS, DRAW THE CURVES WITH A FABRIC MARKER BEFORE YOU SEW! One rounded corner closeup is shown below:
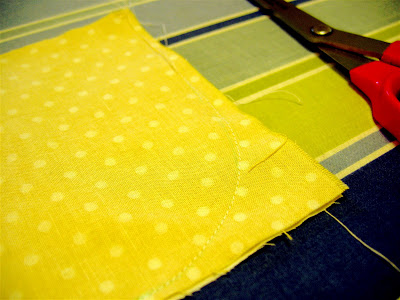
Step 7: Trim corners off with scissors and clip seams.
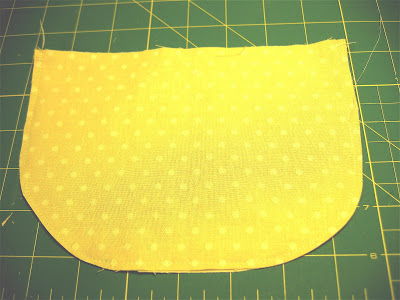
Step 8: Turn right-side out and press.

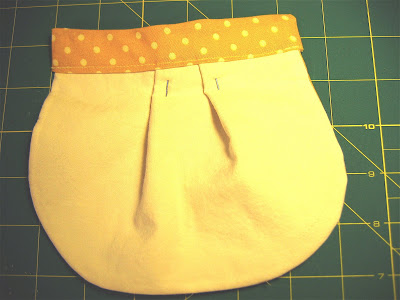
Step 9: Tuck bottom part of pocket into top band, making sure the folded edge of the top band is tucked inside, and pleating the bottom piece to taste*. I would tuck at least 1/2" into the band. The size of the pleats will vary depending on how wide your top band is, but I would guess they will be about 1/2" deep; adjust the size of the pleats so that the edges of the bottom piece fits exactly inside the top band. Pin pleats to secure.
*Want the one you see in the picture? On the pink pockets I made two pleats facing out about 2" from edge of pocket. On the yellow pockets I made two pleats facing one way about an inch apart. For the bird pocket I put one large pleat in the center facing inward).
One other thing here: I found that the pocket looks better when the corners of the bottom piece go farther into the top band than the center, so don't feel like you need to make the edge of the bottom even with the edge of the top. If anything this will help your pocket pucker more.
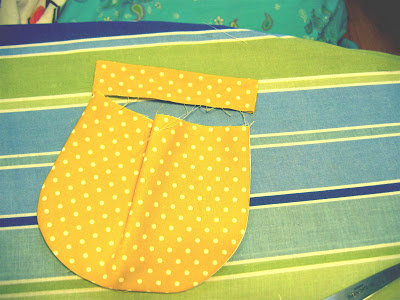
Step 10: With the pocket facing up, topstitch across the bottom of the top band to close everything up. The closer you are to the edge, the harder it is to "catch" both the top and bottom edges of the top band, so be careful. You may want to baste first with the back side up or do some extra pinning. I'm a glutton for punishment so I always just wing it and then end up inevitably tearing out the part I missed. Of course I remain graceful and dignified as I do so. Always.
Here is a view of the finished pocket from the back (I used a white lining for one of my rectangles because I was short on fabric. You don't see the inside anyway):
 Notice that it looks a little uneven still; this will go away once you sew it to your garment. Remove pins, press it, pin to your garment and sew around the edges to secure. If you pin it so that the top band doesn't lay completely flat against the garment, the pocket will have more of a rounded look and will pucker away from the garment somewhat.
Finished dimensions are approximately 6" x 7"


