
Linen Beatrix with vintage buttons

Working on a pattern update always gets me excited to sew it again, and this gold linen Beatrix was my “new Beatrix” last year. I was working on some sleeve cap and back armhole adjustments which needed to be tested out, and although this version wasn’t made with the FINAL-final pattern pieces — we ended up adding a dart at the top of the back shoulder which is notably absent in this top — I am happy with how this turned out and it’s definitely wearable. (Read more about the Beatrix Pattern update HERE)
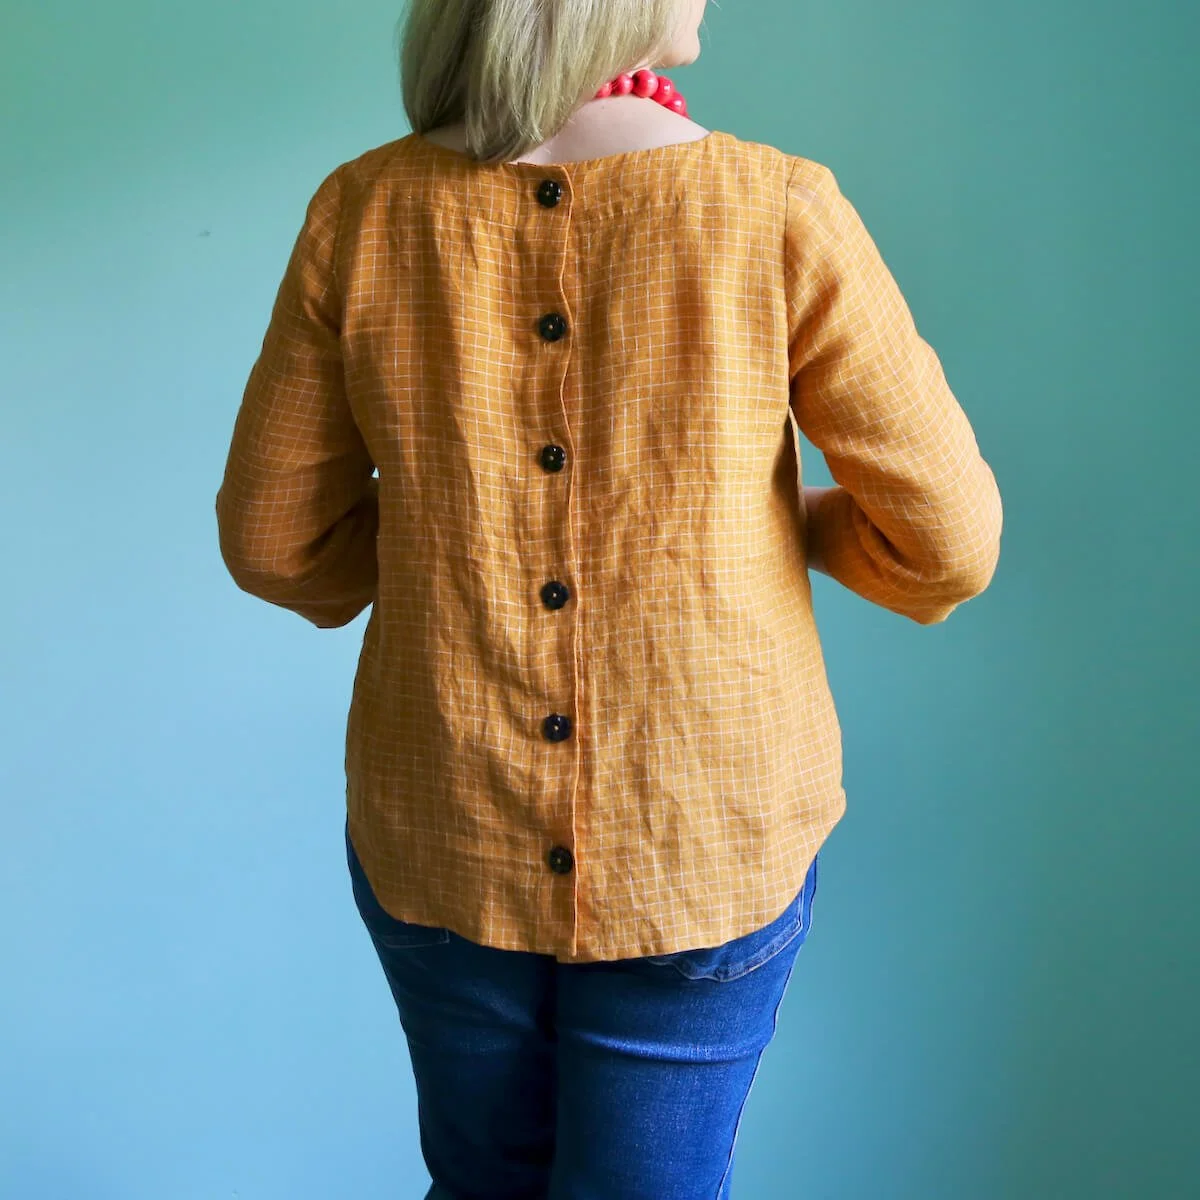
The fabric is a 100% linen, a dark golden yellow color with a small woven grid pattern, though squinting at the photos I suppose it might also fall into the “orange” color category. Is it orange? Is it yellow? Is it brown? How we perceive color is fascinating. This, by the way, is the same fabric that I made this Garnet top for Clementine out of (also the one I used for the Garnet sewalong), just in a different color.
Linen can be a bit tricky to work with. Keeping the fabric on-grain when cutting is probably my biggest challenge, and if you’re not a fan of wrinkles, this fabric is not for you. I personally enjoy the cosy/casual look of a rumpled linen garment and find that as long as I pull it out of the dryer promptly, I don’t usually need to iron it. Honestly, there really is not much point in ironing this one as I’ve found it wrinkles as its worn, plus — added bonus — I’ll be able to really annoy the Wrinkle Snobs with this one heeee. Seriously, though: people who take the time to comment about wrinkles on other people’s clothes are totally the worst. Find something more useful to do, I beg you.


Beatrix has two pattern views (see them here); this is “view a” which has the 3/4 length sleeve rather than the short sleeve, and has the foldover button placket (rather than a separate button placket piece which can be made (but doesn’t have to!) with a contrast fabric. I like this button placket because it’s built into the back piece so it’s slightly faster to sew than the separate placket in view b.
I used a set of gorgeous black vintage vaguely-flower-shaped buttons that I purchased from the Button Lady here in Ann Arbor (who sadly, is no longer in business…). I probably spent 2 hours standing at the cash register trying to purchase those buttons. IYKYK.

You can see (above) that before I attach the buttons to the back placket — HOT TIP — I use washi tape to hold the buttons in place so that they don’t slip and slide around while I’m moving them from the table to under the presser foot to sew them on. And yes, I’m insane, I always sew my buttons on by machine, but it works just as well to sew them on by hand. Oh and that expand-y tool thingy (Simflex?) is nice too, though I don’t find it to be super necessary, just a handy tool to have if you’re into hoarding-ahem-collecting extra sewing gadgets.
Listen, I am fully aware that sewing buttons is a non-starter for a lot of folks, but it’s one of those sewing skills that I really want to encourage you to tackle if you haven’t yet!! Buttons add a beautiful detail to garments and of course button-sewing skills are very practical, but when they’re sewn well it can be a point of pride. And let me just plug the instructions for the Beatrix pattern for a second, because I personally think the button instructions are very good. I added my favorite tips for sewing buttons and buttonholes and I do a lot of hand-holding as I walk you through those steps, so buy the pattern please!!
(PS. If you want to learn more and see photos of how I sew buttons, check out my Buttons and Buttonholes post of the Beatrix sewalong)
