Cleo Skirtalong Day 3: Pockets and Side Seams
Cleo Skirtalong Day 3
Welcome to Day 3 of the Cleo Skirtalong! If you’re just joining us, see all of the skirtalong posts here.
Today we’ll attach the pockets and sew side seams. Note that these steps differ for Views A and B. We’ll start with View A, so if you’re sewing View B, scroll down!
Step 2. Attach and sew pockets (View A)
Align curved edges of POCKETS and FRONT SKIRT. With 1/4″ seam allowance, stitch pockets to front skirt along curved edge. It’s important to note here that this is the only time you’ll use a 1/4″ seam (the rest of the pattern uses a 1/2″ seam allowance).
Here’s a closeup of that curved seam:
Clip seam allowances, being careful not to clip through the stitches. Press the seam allowances and pockets away from the skirt.
Next, I recommend understitching the curved seam. Unfortunately it’s hard to get a good photo of this (I’ll put that on my tutorial to-do list), so you’ll just have to give it a try based on my written instructions.
To understitch, first press open the seam, pressing the seam allowances towards the pocket piece (so: away from the skirt). With the garment right-side up, stitch 1/8″ away from the pocket seam lines (this is the actual understitching, and it keeps the pocket lining inside the pocket), through the pocket and both seam allowances (so: 3 layers). Then flip the pockets to the wrong side and press. It should now look like this:
Note that the understitching is white in the photo above, and is not visible from the outside of the skirt. You can also just topstitch the pocket curves after pressing them if you’d prefer!
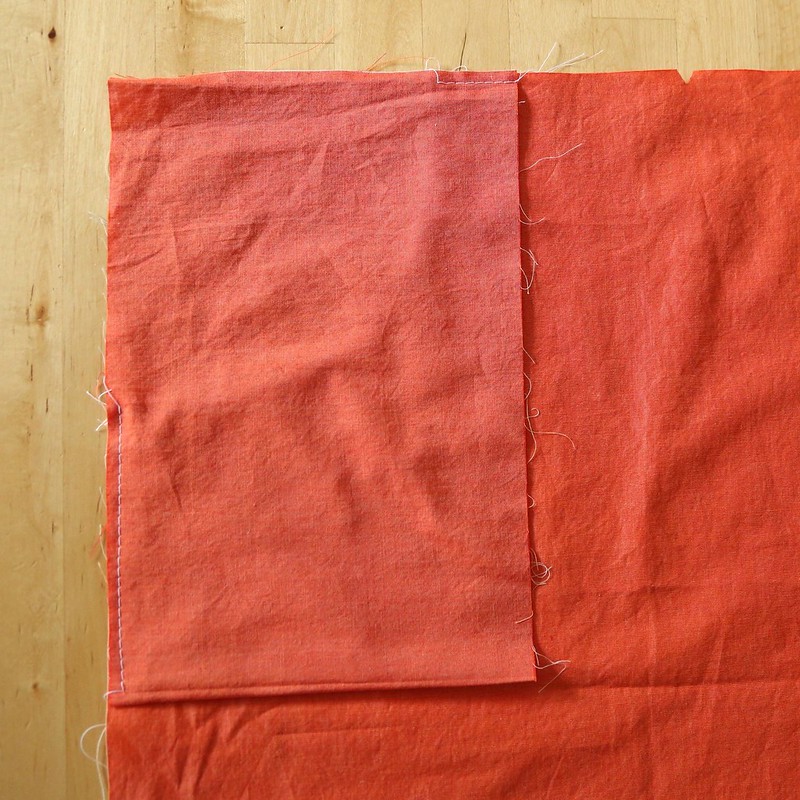
Next, fold the pockets up (basically you’re folding them in half) so that their lower edges line up with the top edge of the front skirt. Press, making sure the tops and sides are lined up with the skirt.
Sew just the inner edges of each pocket together (white dashed line in the photo below), but be careful to sew only through two pocket layers and not through the skirt — you’re just closing the inside of the pocket! Finish those seams; I’d recommend either a serger or a zig zag stitch. Then align pocket edges with sides and top of skirt again and press.
Now baste the top and outside edges of the pockets to the skirt 1/4″ from edge (pretend that inner pocket seam is already sewn in the photo below…ahem. oops!). This step is important to hold the rest of the pocket in place while you sew the skirt together.
Here’s how the View A pockets should look from the inside (left) and outside (right) at this point:
I finished my inside pocket seams with my serger, but a zig zag finish works just as well. Check out the Seam Finish Appendix in the back of the pattern for my favorite seam finishes.
Step 3. Sew side seams (View A)
Now grab your BACK SKIRT pattern piece. Pin and sew front skirt and back skirt together along sides.
Cleo skirtalong
Not shown: Finish side seams as desired (zig zag or serge). Press seams toward back skirt.
Cleo skirtalong
Step 2. Attach pockets (View B)
Pin one pocket to each side of the front skirt with right sides together, aligning pockets at notches.
Sew pockets to skirt with 3/8″ seam allowance. Note that the seam allowance is 3/8″ here, but will be 1/2″ for the rest of the pattern. Finish these seams as desired, only along pocket (the side seams will be finished later). I’ve finished the seam below using a zig zag stitch.
Now it’s time to add the pockets to the back skirt! Before you do this, place the edges of the back and front skirt next to each other and make sure the pockets are lined up. I often find that even when I mark my dots and cut my notches, they can still be a little bit “off.”
Once you’re sure they’re lined up, pin and sew the pockets to the back skirt using a 3/8″ seam.
Press all of the pockets away from the skirt pieces. Understitch seam allowances to pocket by stitching through the pocket and seam allowances 1/8 away from the seam you just sewed (in the photo below, it would be just to the right of the seam).
Cleo skirtalong / attach pockets view B
Step 3. Sew side seams (View B)
Pin the front and back skirts together, lining up the pockets at the sides. Sew the sides together from the top of the skirt to the first dot, around the curved edge of the pocket, and from the second dot down to the hem.
Finish seams as desired (I used a serger, but you can use a zig zag or even a french seam for this seam). Press the pockets toward the front of the skirt.
That’s all for today! We’re going to break for the weekend, then come back on Monday to assemble and attach the waistband.
How are your skirts coming along? Feel free to leave comments & questions here, on Facebook or on Instagram! And we’d love to see your photos (use the #cleoskirt tag)!


